Find pro tips and information to help you with your space request in 25Live!
Submitting a space request:
Using the Room Availability view:
Need to find a list of events that you submitted?
View the video and/or use the instructions and screenshots detailed below.
Head to your Dashboard by selecting the ‘25Live Pro’ button on the top right hand side. You should see ‘’X’ Events in which you are the Requestor’ under the ‘Create an Event’ button on your Dashboard. Please note, it shows number of events and not necessarily the number of occurrences.

If you need to search for Events, Locations, or Organizations, you can reach the Search page through two different methods:
a) You can click on the ‘Go to Search’ button on the top right hand of the screen, circled in red.
b) Or if you click on the three stripes with ‘More’ circled in orange, it’ll expand and you can click on ‘Search’ as well.


Do you want to build upon a Public Event Search?
On the Search page, please click on the drop down menu next to the ‘Events’ option. When you scroll to the bottom, you’ll see the Public Searches at the bottom.


When the list of events appears, please toggle the option to the Advanced Side.

You’ll see the parameters of the search listed out:

If you want to see Confirmed events for tomorrow, you can click on the ‘Occurrence Dates’ parameter and click on the next day. When you click ‘Search’ again, you’ll get a new list of events:

If you want to see events occurring in a number of spaces all at once:
Choose the ‘Availability’ view, which is accessible through the ‘More’ option on the top right hand side of the screen.
You’ll get to this view below, where you can select a location search (either one that’s already made or one that you had created and saved) using the drop down menu. It’ll show rooms down the rows and times by the column. You can view another date as well.

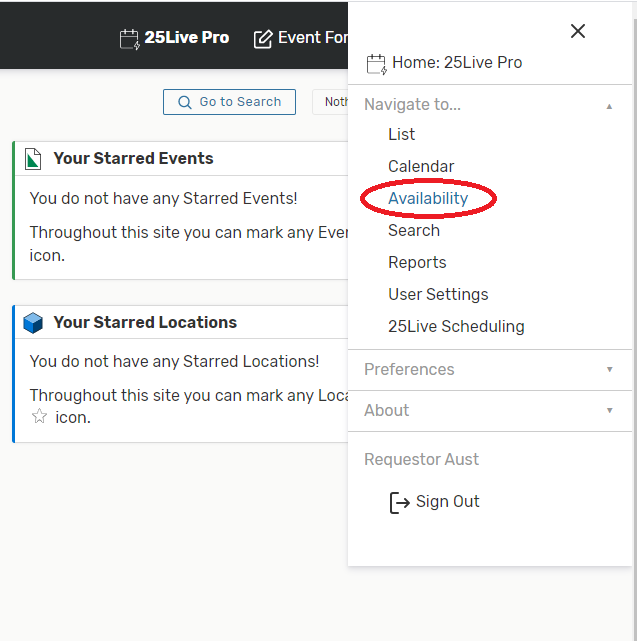


You can adjust how many hours to view at once as well using the small icon above the first location and to the left of the first hour:


If you want to send Event Details to someone else, you can do that directly through the system!
View the video and/or use the instructions and screenshots detailed below.
Click on any event to open it to the Event Details page. On the right hand side, you’ll see a drop down option titled ‘More Actions’.
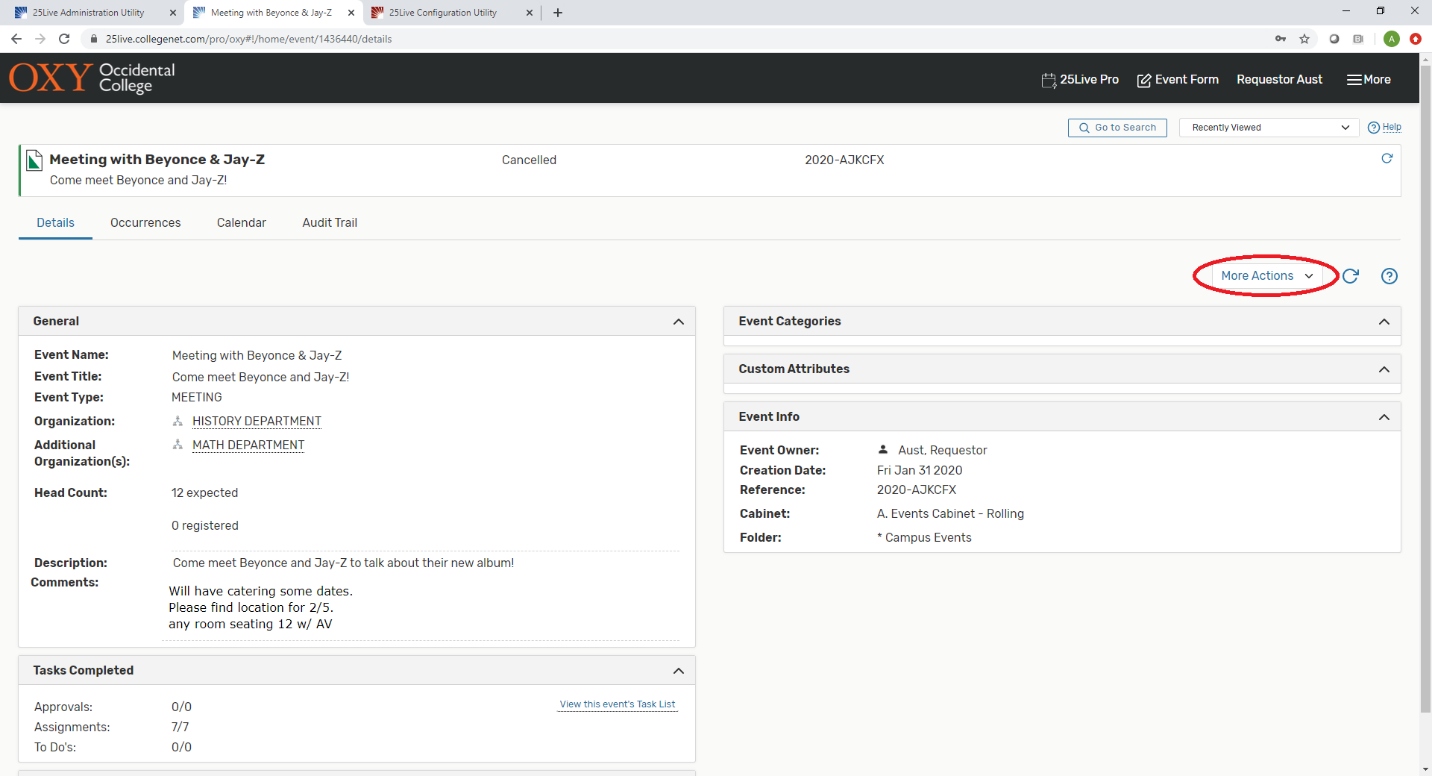
Of that list, select on ‘Email Event Details’

and you’ll get a little pop-up window:

You can send to a variety of people or type in another email address in the ‘Additional Recipients’ on the right hand side. If you click the blue, hyper-linked options, you’ll get a smaller pop-up where you can type in a person’s name and it’ll search through Oxy’s directory. It is not recommended to send to listservs, as there are some compatibility issues.

You may send to external vendors, but I recommend selecting ‘No Link’ as non-Oxy people will not be able to login to view this information:

If sending to external vendors or for more informative emails, you can select the ‘Include event details in body of message’ option at the bottom and it will give a summary of the event, which you may be used to seeing in R25 confirmation emails.
